

I’ve been sewing for a long time now. In school, I learned how to cross stitch, spin and knit, to sew, and to batik. I transformed my dad’s old jeans into bell bottoms on my mum’s very old sewing machine which was so heavy, I could barely lift it! In art school, I sewed costumes for my experimental films, but sewing was just a means to an end.
Then for years I forgot about sewing. I turned to other media for expression painting, photography and print making. Each relatively short lived (although a few years ago I found my old camera again and have been hooked ever since), as I became somewhat proficient in each new fad, I lost interest.
Then, after moving from Shanghai to Bern, I suddenly felt the urge to sew. So, I dusted off my sewing machine from my uni days, bought some fabric and made a skirt. It’s was mostly well made, but I definitely chose the wrong fabric. Since then, the skirt has been cannibalised, but I’ve been sewing my own wardrobe since.
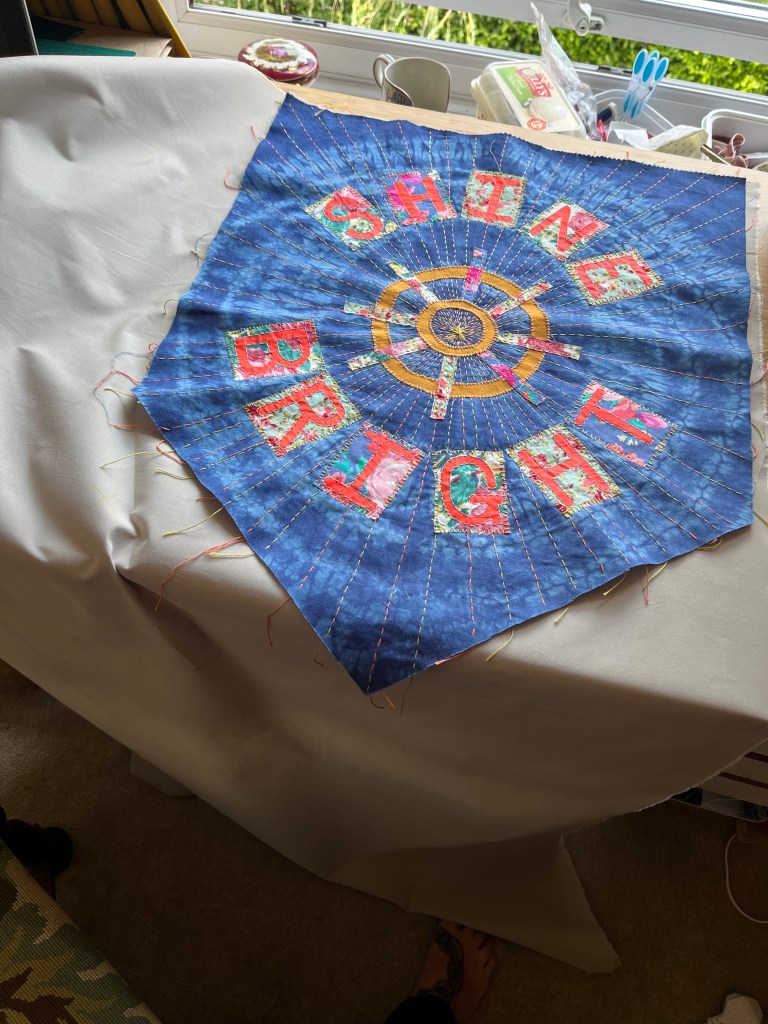
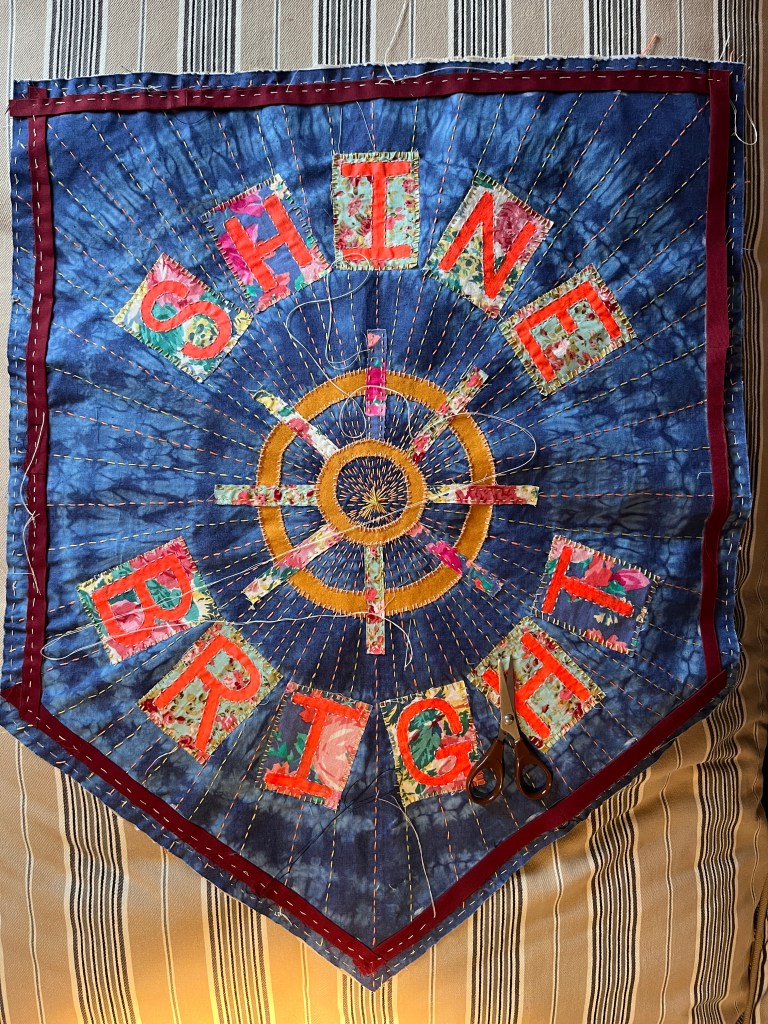
Fast forward seven or so years, I’m now exploring other techniques, such as embroidery, felting, resist dying and teaching a semester long Textile Art course to grade 7 and 8. (I’ll make a post about the course I’ve designed at some point.) For now, I want to show one of the examples I’ve created for the course. At the end of the semester students can choose their final project using the techniques they’ve learned, I created a fabric banner as an example final project.
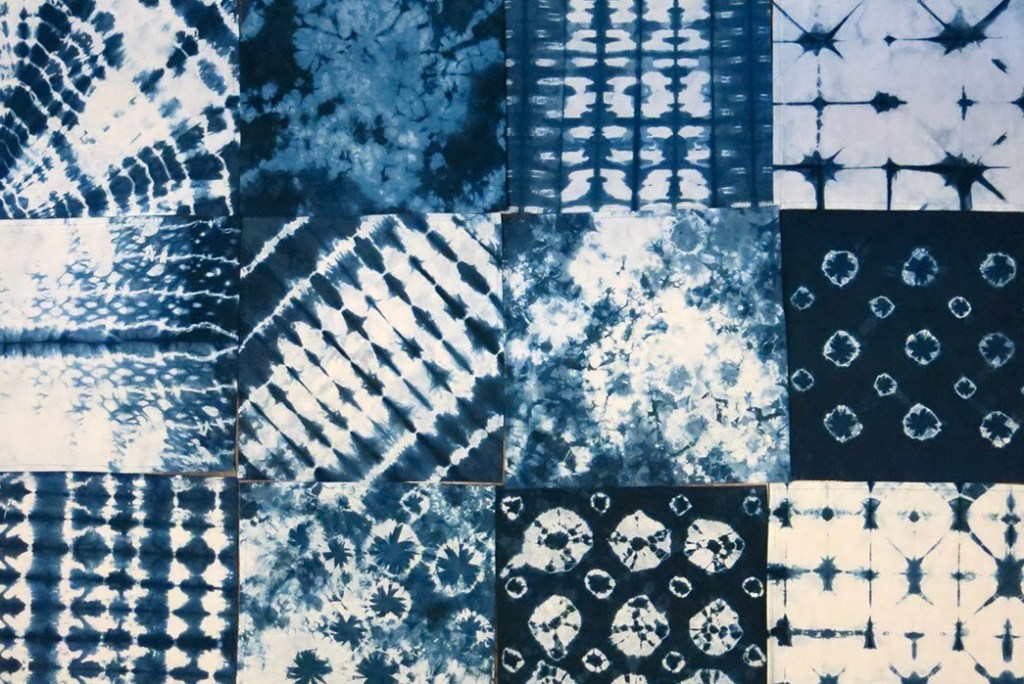
Step 1: Tie-dye
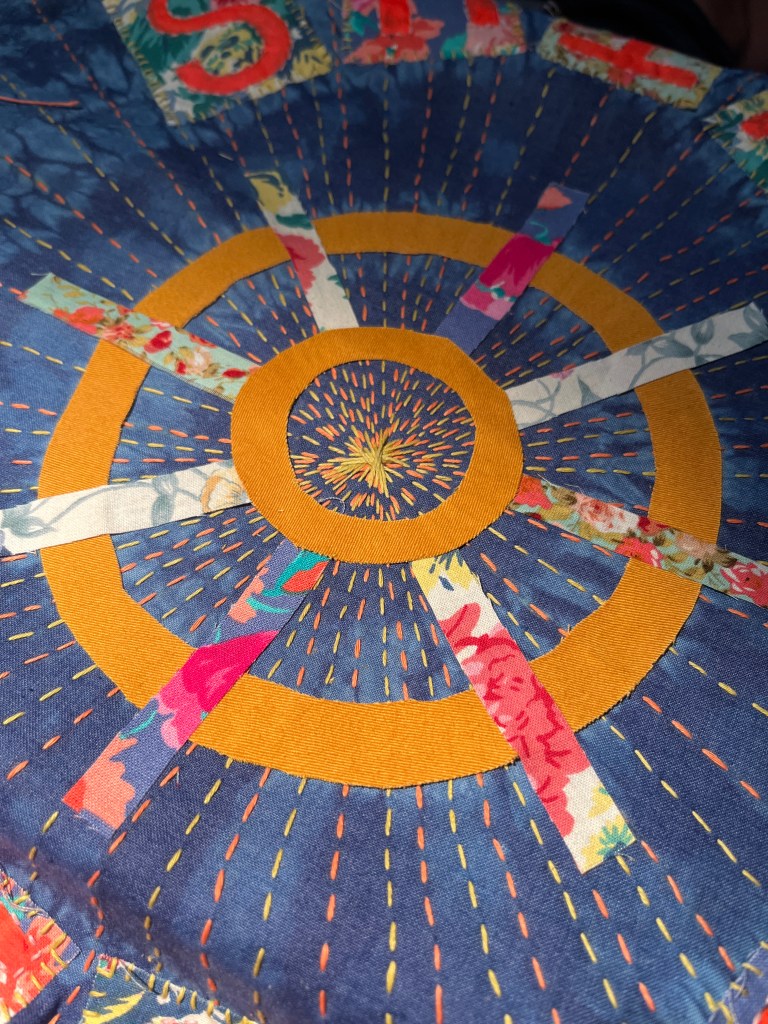
I found some white cotton in my fabric stash and some Rid indigo fabric dye. I tried different ways of tying the fabric following the instructions on the Rit website. Instead of using rope, I used yarn and I forgot to wet the fabric. I couldn’t tie the yarn tight enough and not wetting the fabric prevented deeper absorption of the dye. The piece that did work relatively well was the one I sewed. I used loose running stitches which I then pulled taught creating concentric circles. I looked at Japanese Shibori techniques for inspiration.
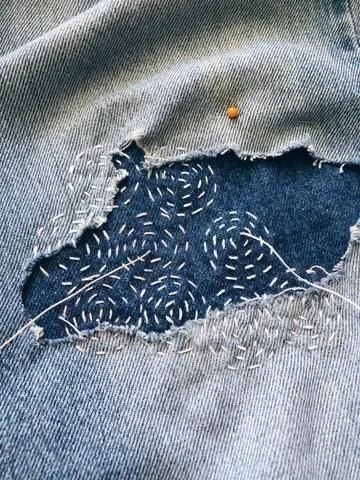
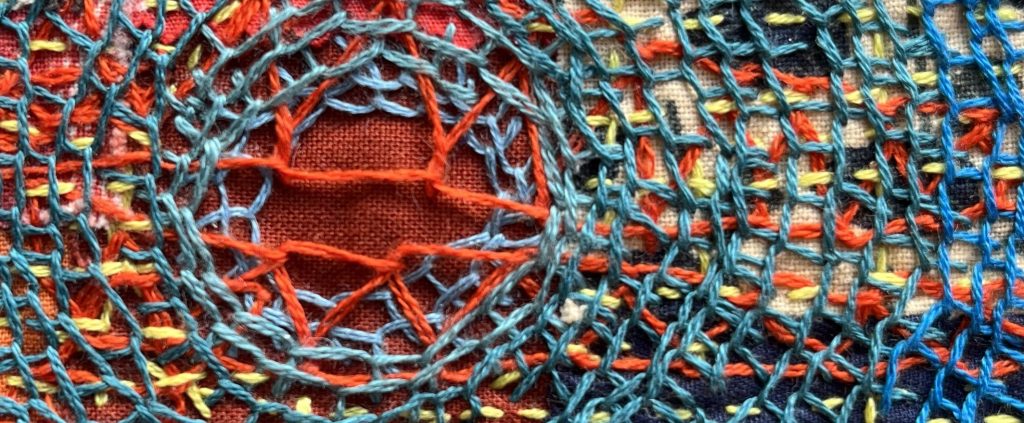
Step 2: Interfacing and Sashiko stitches
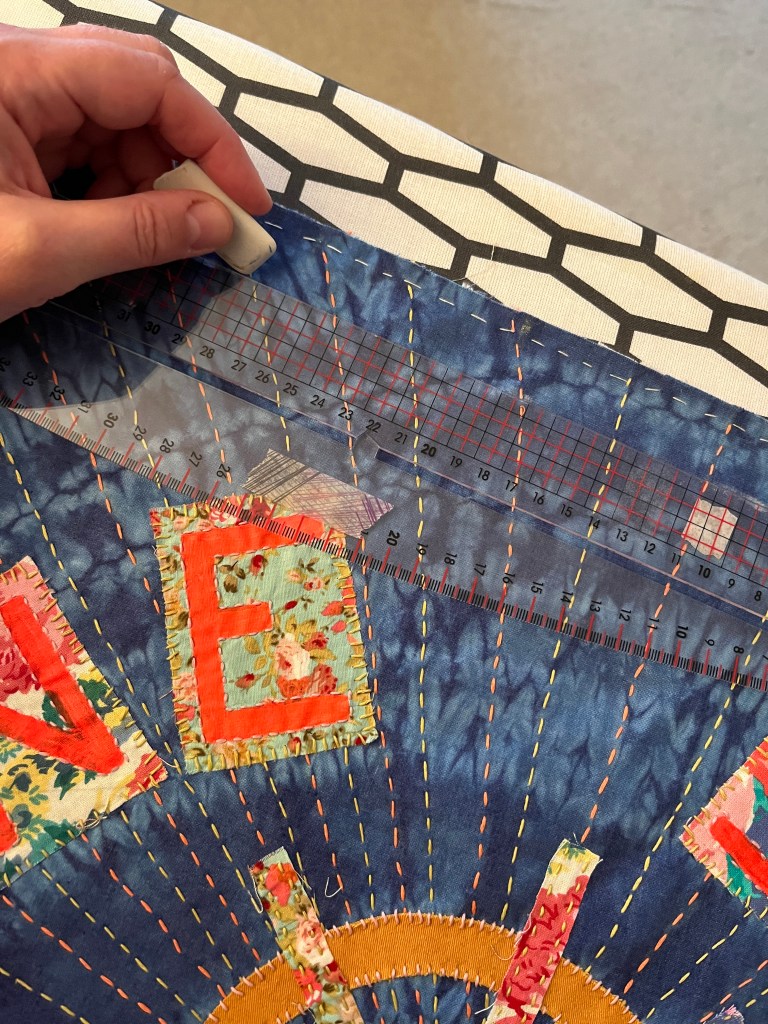
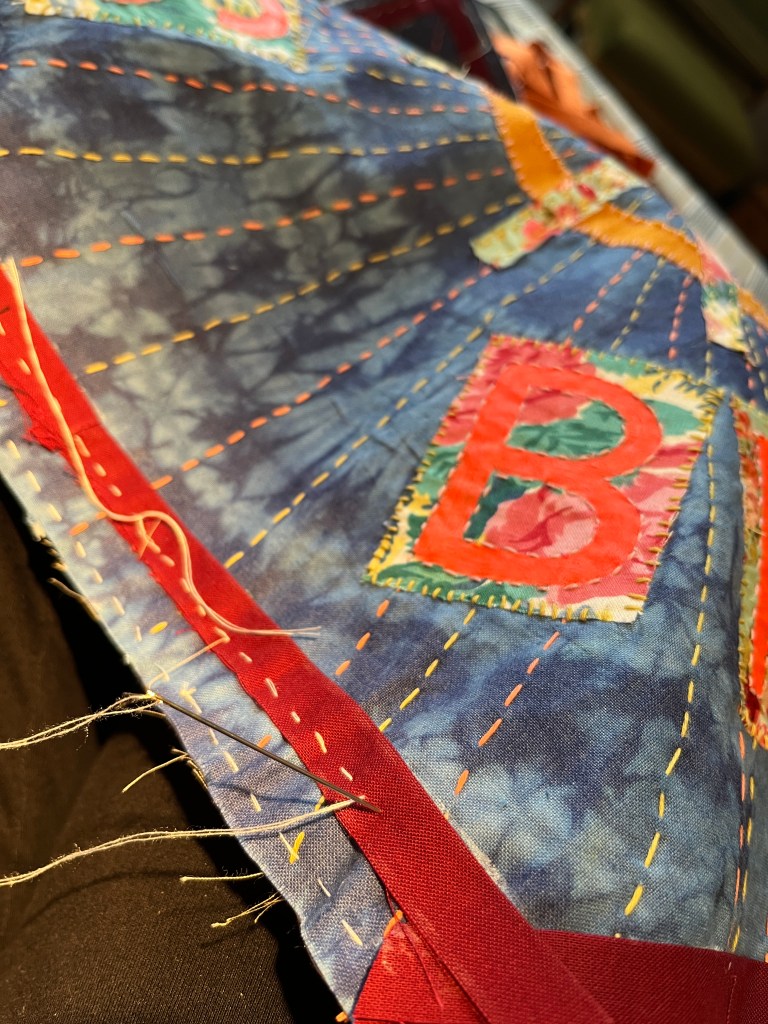
Once the fabric was dry, I added interfacing to the back. I wouldn’t necessarily do this if the piece is smaller. I drew radiating lines with tailor’s chalk and added orange and yellow Sashiko (see also: Boro stitches or running stitches).


Sashiko vs Boro vs running stitch
What is the difference between Sashiko, Boro and running stitches?
Sashiko is a form of decorative needle work which uses running stitches to create patterns on fabric.
Boro is the mending process which uses Sashiko stitches to create the final stitched and layered textile. Boro means “tattered”, “ragged” or “patched together” in Japanese and its purpose is to mend or repurpose worn out fabrics, extending the life of the fabric and preventing waste.
Boro relies on Sashiko as its stitching method. You can do Sashiko without doing Boro, but you can’t do Boro without Sashiko.

https://www.zenstitching.ca/blog/what-is-the-difference-between-sashiko-and-boro-stitches

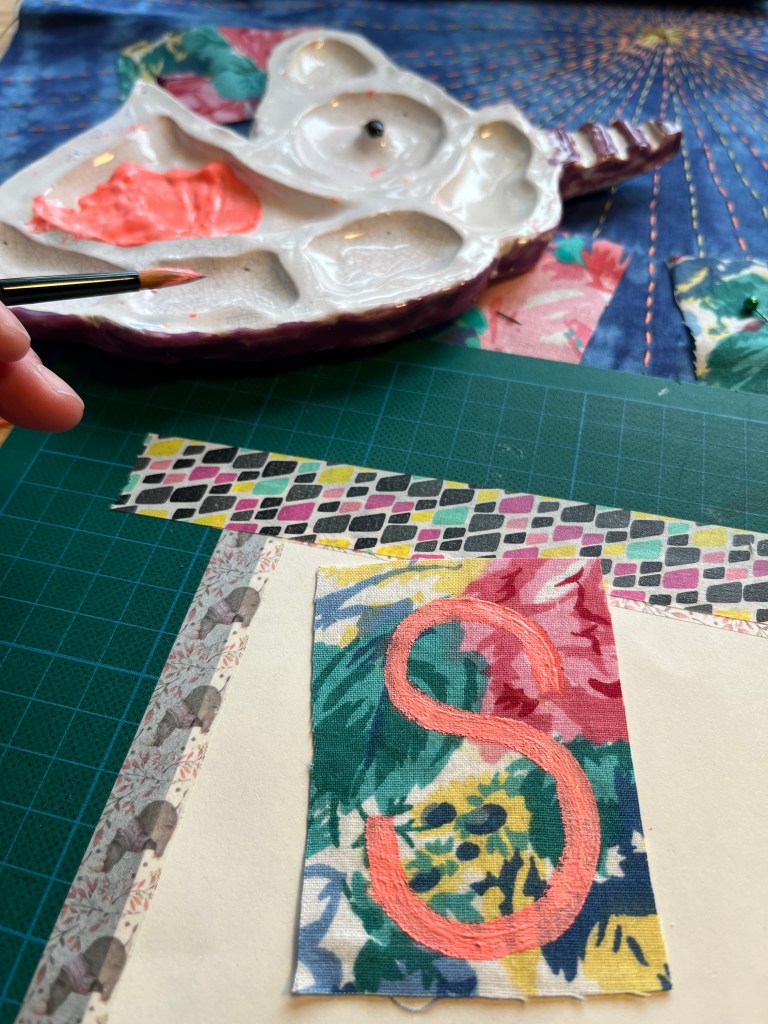
Step 3: Painting patches and whip stitches
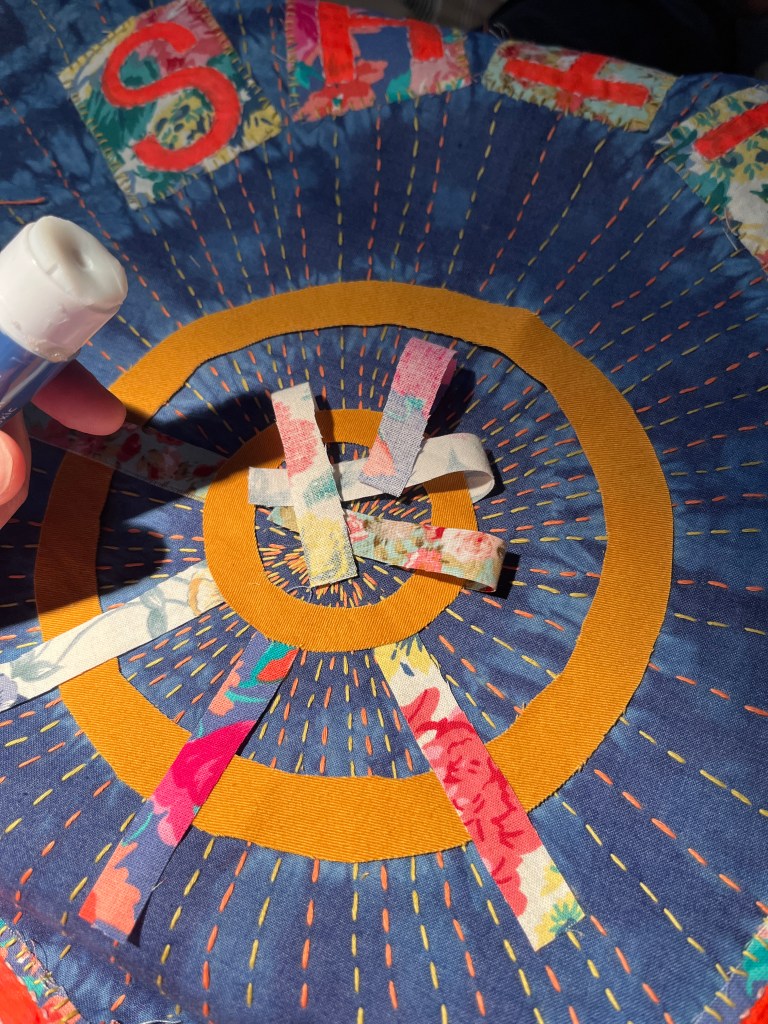
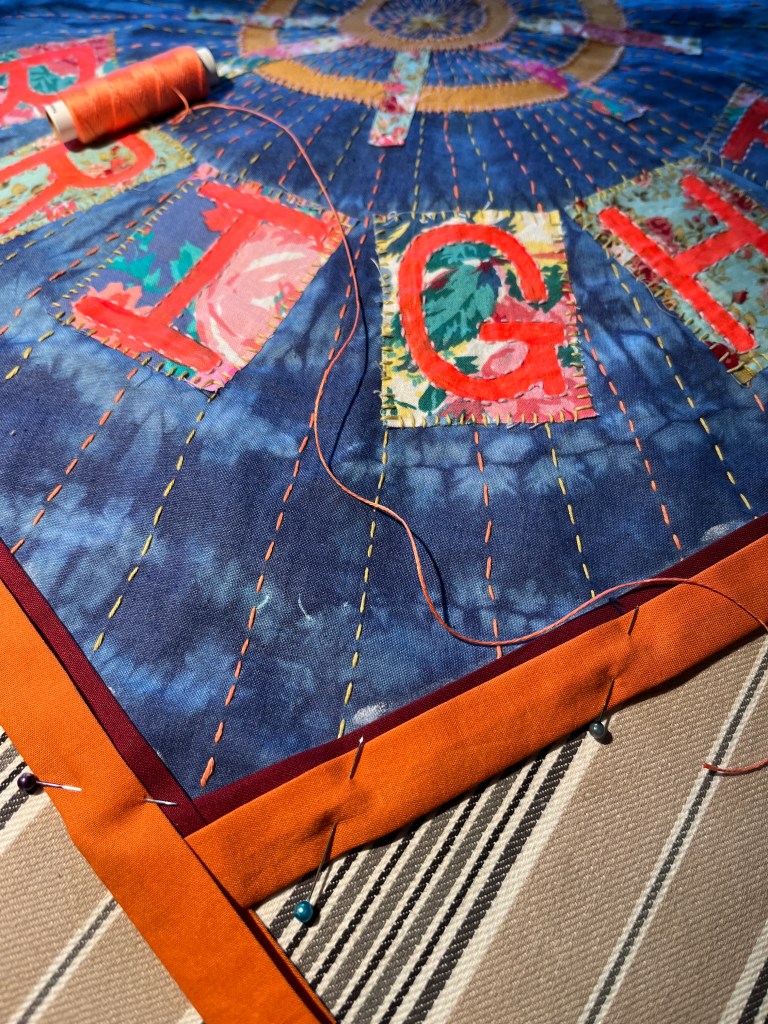
I cut patches and painted letters on them with orange fabric paint. Then I used glue stick to place the patches and then used a whip stitch to secure them. I also added running stitches to outline the letters. I used the same technique to add an abstract sun design in the middle of the banner.

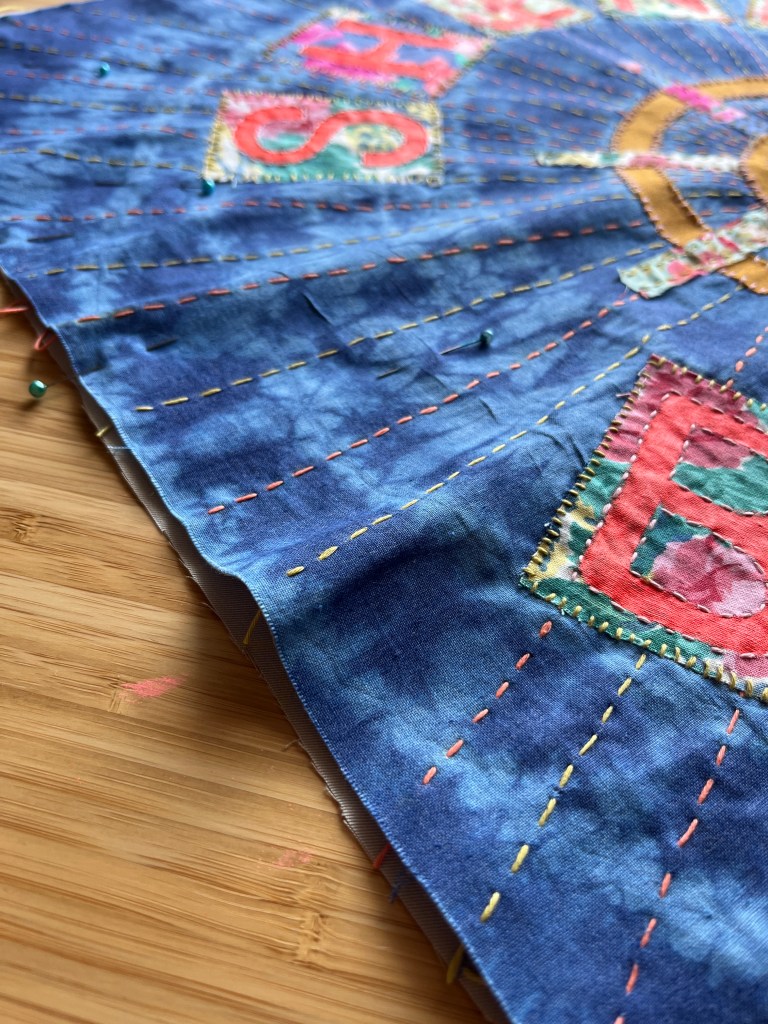
Step 4: Backing, basting boarders and more Sashiko stitches
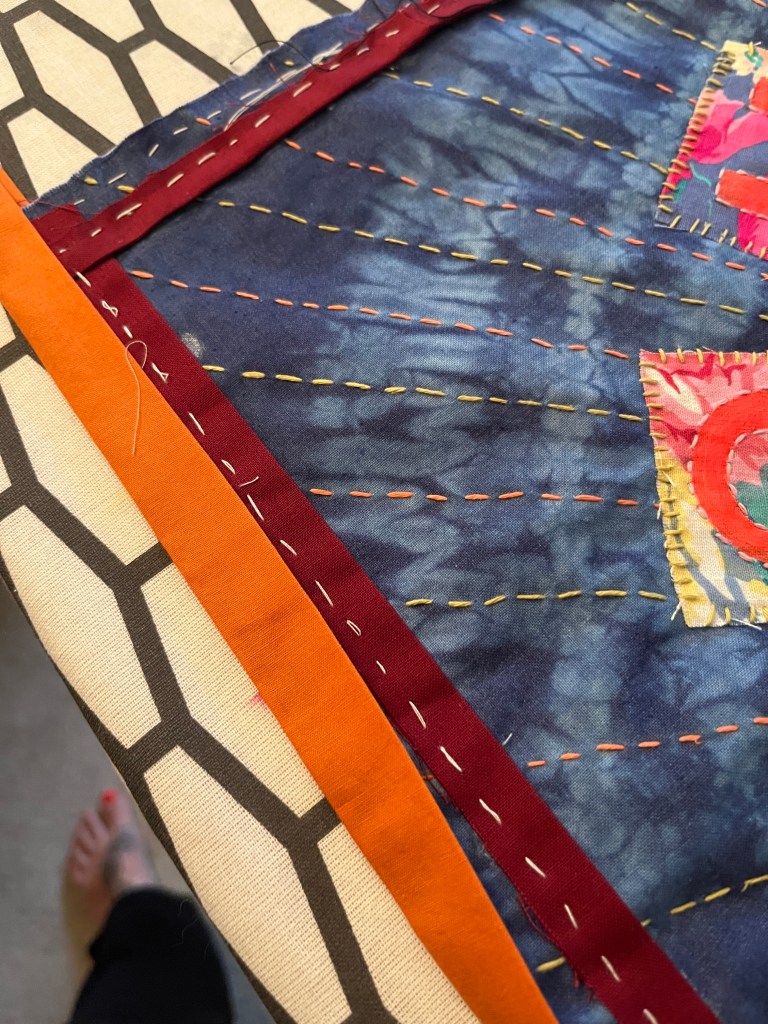
I cut grey fabric for the backing and basted the two layers together. I cut strips of orange and dark red fabric on the grain for the binding and sewed both down with a row of running stitches.
Step 5: Loops
Finally, I used scrap bits of the dyed fabric to make the loops which I bound with strips of dark red binding and sewed these to the back of the banner.
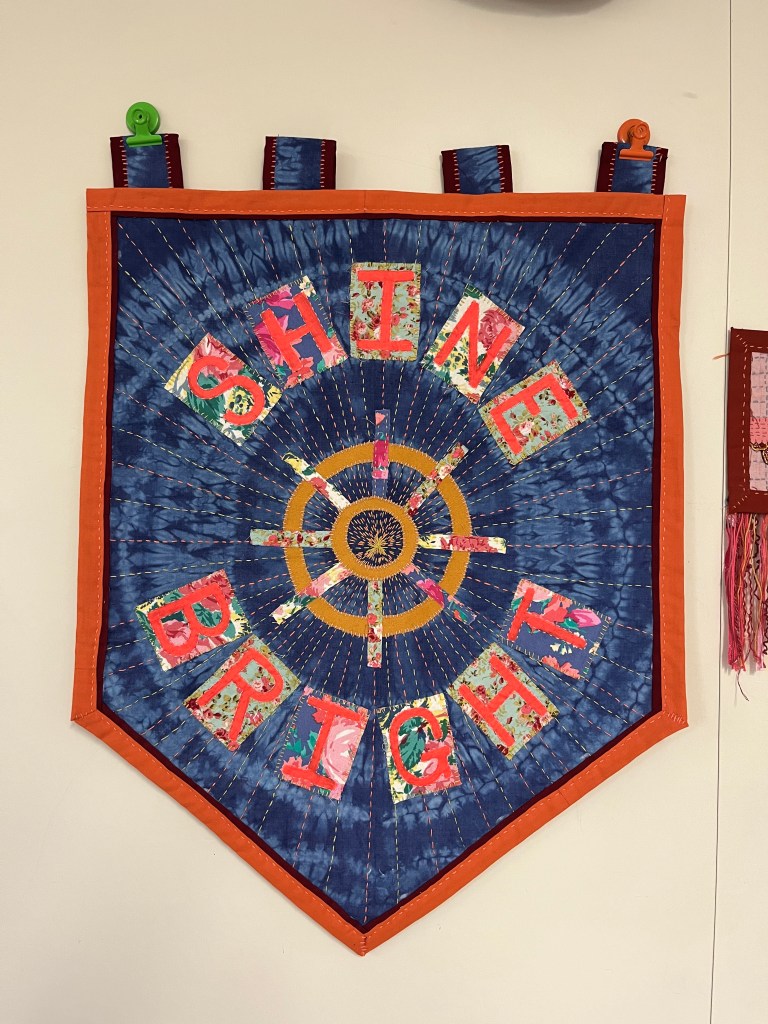
I’m very pleased with the final result! Next time I might use less busy patches to make the letters stand out more, or I might cut the letters out. Anyway, I think I did pretty well for a first all hand sewn banner!


Leave a comment